Microsoft Technical
What is a Passkey and How do I Configure and Set it Up?
| 9 min read

- Tyler VaughnSenior Consultant
A passkey in Microsoft 365 is a passwordless authentication method that lets you sign in to your Microsoft account using biometrics (like fingerprint or facial recognition) or a device PIN instead of a traditional password.
Passkeys are valuable in passwordless varieties or simply as a phishing resistant secondary MFA Method.
Why Passkeys? (Or: Why Your Keyboard Will Thank You)
Let's face it, passwords are like that one legacy application everyone keeps meaning to retire. They've been around forever, everyone complains about them, and somehow, they keep causing security incidents at 4:47 PM on Fridays.
Passkeys bring two game-changing benefits to the table:
Proximity
Your passkey needs to actually be there. No more worrying about someone in a faraway land using your stolen credentials. If the passkey isn't physically present, the door stays locked. It's like requiring your badge AND your face to get into the building. Someone may have taken your badge, but without your face, no entry is gained.
Domain Validation
Passkeys are smart enough to know the difference between Microsoft.com and Micr0s0ft.com (yes, with zeros). They use domain-specific validation, which means phishing sites get an automatic "nice try, but no." Your passkey simply refuses to authenticate against fake domains.
These two items combined comprise what is known as “Phishing Resistant” Authentication.
Say goodbye to passwords (and good riddance!)
Remember the good old days when your password was just "password123?" Neither does your IT department, they blocked that years ago. But here's the thing: even your super-secure 47-character password with three emojis and a hieroglyph isn't cutting it anymore.
Enter passkeys, technologies way of saying "we're finally done with this password nonsense."
How to set up your Microsoft 365 (Entra ID) tenant for passkeys (Using Microsoft Authenticator)
When setting up your tenant for passkeys, we always recommend a pilot to understand the deployment and scale it properly to ensure no unintended impact is made to your users. Let’s review, step by step, how we do this.
STEP 1
Login to your Entra ID management blade at Microsoft Entra - Microsoft Entra admin center. (You must have privileged role permission to access the Entra Admin Center.)
STEP 2
Let’s ensure we know who we want to target to allow passkeys and set up a group for them. Remember let’s minimize this groups membership to a small quantity of users, this will help us get a foundation in how passkey set up works, and document that for user rollout. It’s typically a good idea to put IT resources in this initial pilot group as it gives the technical team time to experience passkeys.
Navigate to groups & Select “New Group”

Set up the group as a security group and add the members you want to be able to set up passkeys. In my example, I am adding one user, however you may opt to have many users in this group via the members selection.

STEP 3
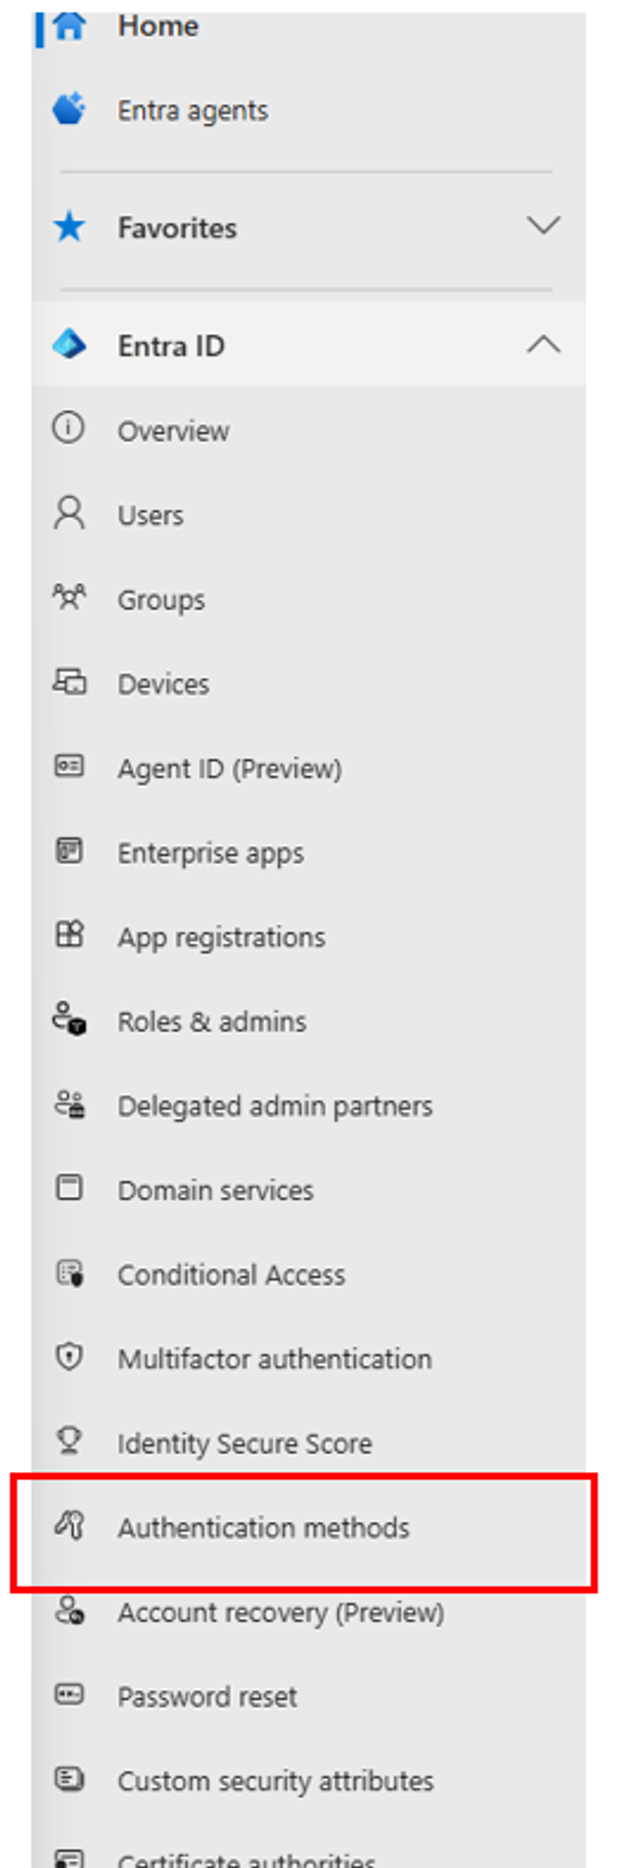
Once your group is created, select “Authentication Methods” from your left-hand menu.
STEP 4
Once in your authentication methods pane, you natively land in the Policies pane. This pane allows you to configure authentication methods for your tenant, and which are allowed for what groups of users. This is very important as you can limit the users or groups targeted for certain authentication types. (This is where we will limit the scope by Targeting just a pilot group for passkey authentication)
Select the “Passkey (FIDO2)” Authentication method, typically listed at the top of the screen.
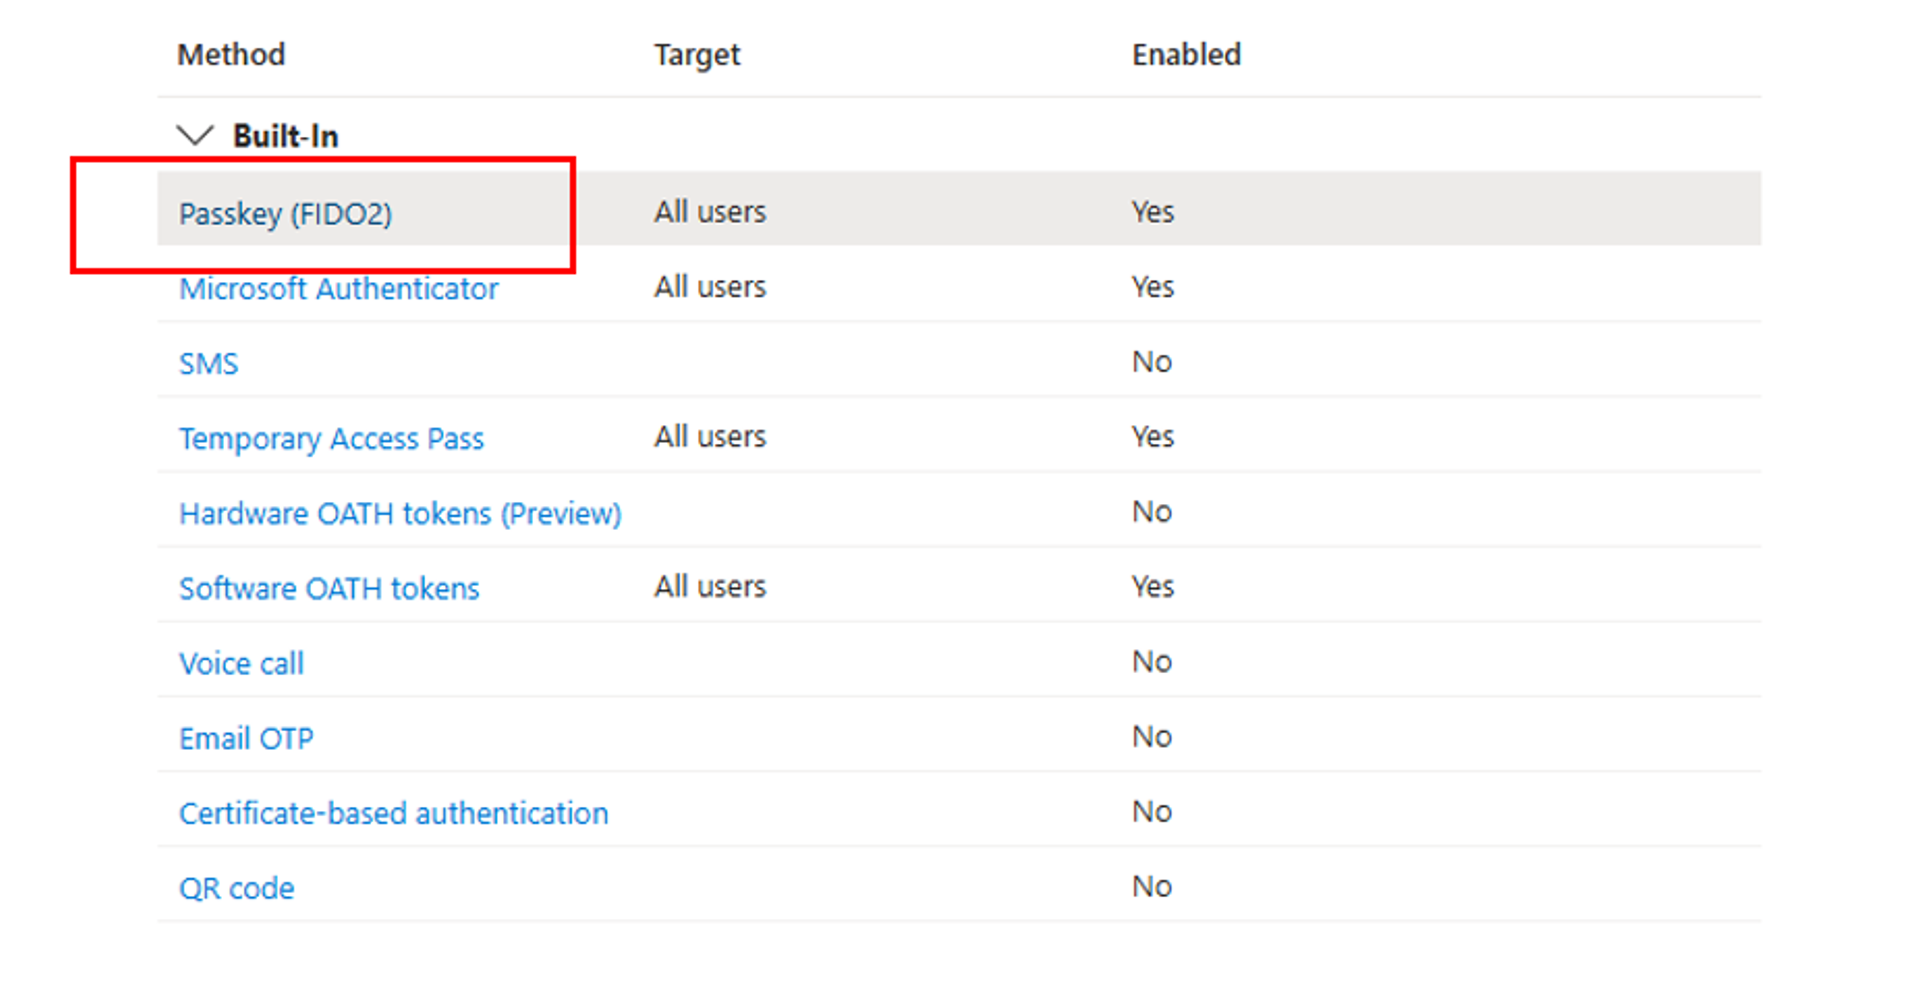
In my example, you will see I already target all users, if you have not setup passkeys you will likely see this as Enabled: No and you can then enable it.
To enable this authentication type, click the toggle button inside the Passkey Options to Enable

Note: If this function is already turned on, you may want to review where are how it is being used in your organization before continuing.
STEP 5
After enabling the passkey authentication method, you can now setup groups you want to include or exclude from your authentication method, if a user is a member of the included group, they will now be able to setup passkeys.
At this point, toggle the “Target” to select groups, and select your pilot group.
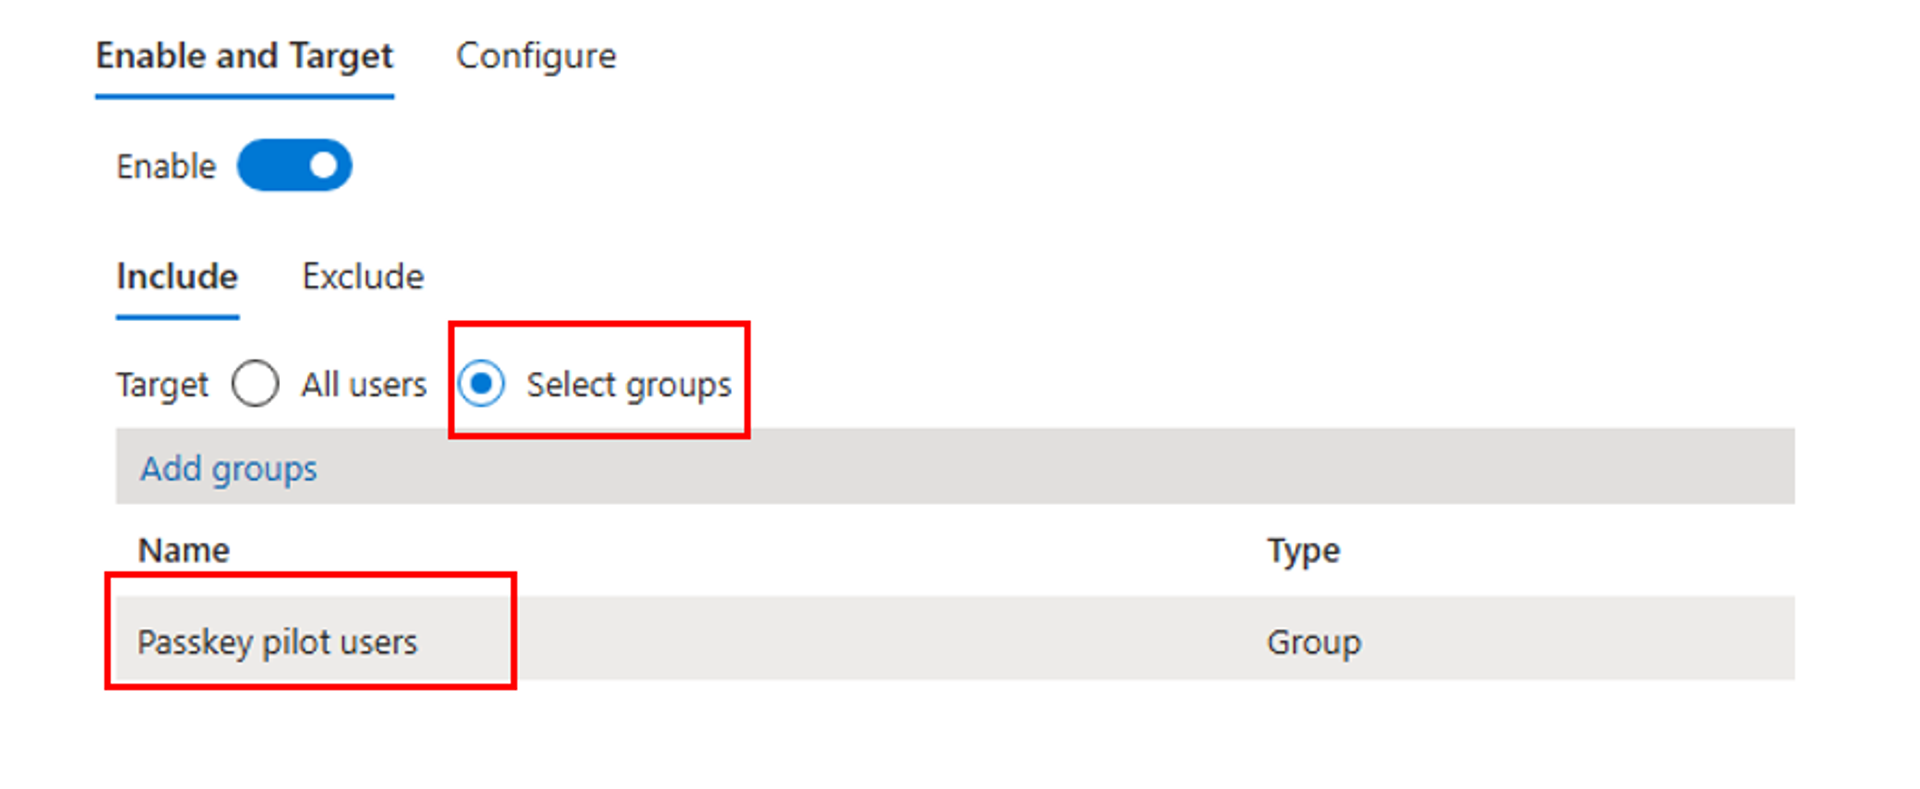
Once you have setup your target, select save at the bottom of the screen. (Again, if you already have this enabled and targeting something else, please review your existing configuration and organizations use case before continuing as passkeys may already be in use!)
STEP 6
Following your group targets, we will select the configure option at the top of the screen to configure our passkey requirements and restrictions.

From this menu, we can configure restrictions, I will talk about each restriction however I will also mention what I recommend for your pilot. This part of the guide gets a little wordy, so stick with me.
Allow Self-Service set up – This allows users to setup their passkeys using the security info option in their Microsoft 365 profile and authenticator app, go ahead and enable this option.
Enforce attestation – Attestation is basically a cryptographic certificate, when you enable this function, users can only register passkeys from authenticators that provide valid attestation certificates. This prevents registration of passkeys from untrusted or software-only authenticators that may not meet your security requirements. The Microsoft Authenticator app does support attestation. If you are following this guide solely for Microsoft Authenticator passkeys, I would recommend you enable this function.
Note: If you enable this function, users can only register keys from within the Microsoft Authenticator App and the key will only live on the single device in which the registration occurred.
Note: For both iOS and Android, Authenticator attestation relies upon Apple and Google services to verify the authenticity of the Authenticator app. Heavy service usage can make passkey registration fail, and users might need to try again. If Apple and Google services are down, Authenticator attestation blocks registration that requires attestation until services are restored. To monitor the status of Google Play Integrity service, see Google Play Status Dashboard. To monitor the status of the iOS App Attest service, see System Status.
Enforce Key Restrictions - This enforces the use of AAGUIDs and ensures that the FIDO2 security keys or passkey providers are genuine and come from a legitimate vendor. This is a great security feature to ensure you only have keys used in your environment that you have approved or trust. Recommended to enable for our pilot. (Keep in mind, we will be using Microsoft Authenticator as our passkey provider, if you use a hardware key or similar, please ensure you understand AAGUIDs and what will be required here if you enable attestation. Microsoft makes it easy for us, where they have a check box for Authenticator without a requirement for manual entry of AAGUIDs.
Note: If you turn off key restrictions, make sure you clear the Microsoft Authenticator checkbox so that users aren't prompted to set up a passkey in the Authenticator app on Security info.
Restrict specific key types – This option is then impacted by the AAGUIDs you input below it. If you select “Allow” then list the AAGUIDs you trust. If you select “Block” Then list the key types you don’t trust. I would recommend you set this to “Allow” then select the “Microsoft Authenticator” Check box to automatically add the AAGUIDs for Microsoft Authenticator. If you use any other type of passkey, this must be known at this step and the AAGUID must be added to allow the key to function.

You are now configured to allow and use passkeys for your pilot group
So what is next? Let’s create a passkey.
Before we begin, please ensure you have Microsoft authenticator on your mobile phone, and ensure it is signed in with your 365 account you plan to create a passkey for. This next section is a straightforward how-to guide, essentially, follow these steps and document them for your users to use when enrolling once you complete your pilot.
STEP 1
Open the Microsoft Authenticator app, if you haven’t already set up your account in Microsoft Authenticator, do so now.
Once you have your account linked to Microsoft Authenticator, tap on the account where you want to create a passkey.
Select “Create a passkey”
From here, you will be asked to sign in to create the passkey, sign in when prompted and use biometrics as requested on the device.
Once you have signed in and the device has created the passkey you will be notified with a screen titled with “Passkey created.” From here you can start to use your passkey!
STEP 2
On a computer, go ahead and try to sign into portal.office.com and follow these steps to use the passkey.
Navigate to portal.office.com (Use incognito if you are already signed in with another account or similar to validate the passkey)

Enter your username and continue, after you have entered your username, you can select the option for “Use your face, fingerprint, PIN, or security key instead.

You will then be prompted for “Choose a passkey” Go ahead and select the QR Code option “iPhone, iPad, or Android Device”

Open your authenticator app, select the blue QR Code scanner option in the bottom right corner (Android is bottom right)

Scan the QR Code and select “continue” in your app and confirm your biometric.
BOOM you have successfully used your new passkey.
This method can also be used in combination with a password, or other passwordless authentication methods to increase authentication strength even further and enforced with conditional access. We won’t cover these additional features here, but they are incredibly powerful and recommended or any organization. Keep in mind, with passkeys and passwordless authentication, we can remove passwords entirely, there is no need to have passwords anymore. This involves additional deployment to get there, but it’s a very easy process.
Thanks for reading and have fun setting up your first passkey!
For those who aren’t familiar with Microsoft 365 passkeys and want to learn more or could use guidance in anything Microsoft 365 or Azure, reach out!